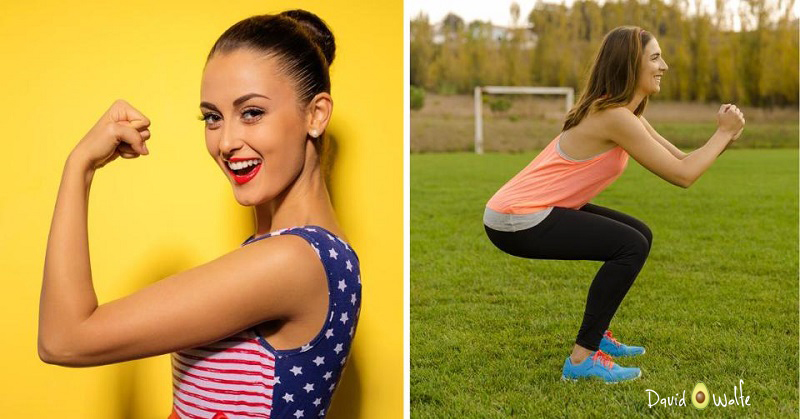
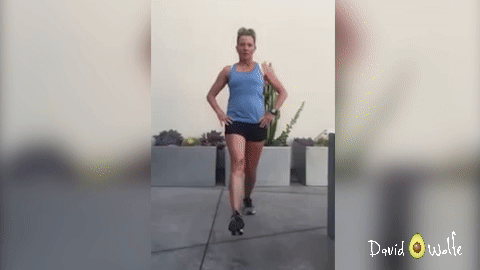
Imagine being able to get your body in great shape without ever having to go to the gym! You can do that with these 9 simple exercises, along with your commitment to the program and smart, healthy eating.
So forget paying for a gym membership. Take these simple exercises with you wherever you go, and with some consistency, you can change your body!
But you may be wondering just how this works without gym equipment. It works by using your own body weight as resistance and by maintaining great form.
In fact, these simple exercises are common in most high-intensity circuit training (HICT) workouts. HICT workouts (often called HIIT, which is high-intensity interval training) are intense and fast-paced, and you can complete one exercises in less than 30 minutes!
See? Getting a fit body does not require hours and hours of working out. It requires knowing which exercises are most effective for your body. Start this plan today!
9 Simple Exercises for a Stronger, Healthier You:
The Workout: Perform the exercises below as a continuous circuit for 45 seconds each. That is, start with the first one, perform that exercise, then move to the next one without rest, and so on until you complete the entire circuit.
Then rest for 1 minute. Repeat as many times as possible within a 30-minute timeframe. And those with experience can work for 45 minutes.
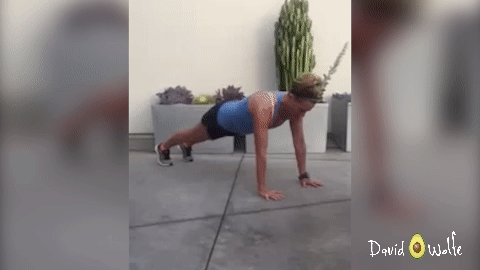
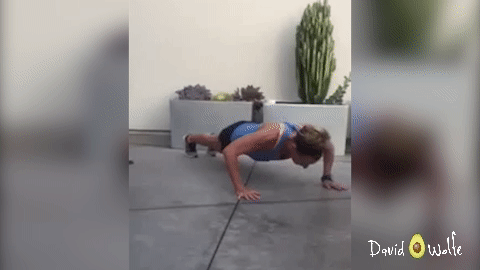
1. Tricep Pushup
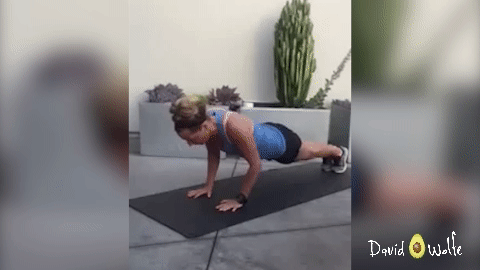
How To Do It
- Extend your arms, place hands directly under your shoulders and set your feet hip-width apart.
2. Your body should be in a straight line from the back of your head to your hips in a plank-like position. And keep your neck neutral and in line with your shoulders.
3. Lower your body toward the floor while keeping your elbows close to your sides.
4. Return to starting position.
5. Pull abs in tight during the entire move.
What To Avoid
- Maintain a nice flat back — do not let your hips sag or your butt stick up in the air.
- Do not drop your head or neck — keep it aligned with your back.
- Do not let your shoulders or upper back droop — keep them strong and aligned.
Modify To Your Needs
- You can widen the distance between your feet for better stability.
- Perform the exercise on your knees until you are stronger.
2. Jumping Lunges
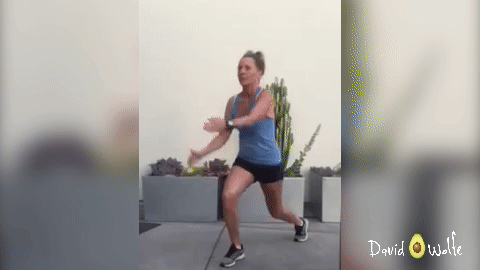
How To Do It
- Stand with one foot forward in a lunge position, keeping your front knee at a 90-degree angle and your upper body upright.
2. Lunge as low as possible without your back knee touching the floor.
3. Keeping your balance, jump to switch your foot positioning, taking your front foot back and your back foot to the front, much like scissor jumps but with a deep lunge.
4. You can use your arms to assist in the jumping motion. For example, when your foot is forward, your right arm will be forward. It should be natural.
5. Make sure to land softly, switching in a continuous movement.
What To Avoid
- Do not let your back knee touch the floor.
- Do not lean forward — try keeping the upper body erect.
- Avoid skipping the lunge motion. Make sure you go into a lunge each time you land.
Modify To Your Needs
- If this is new for you, consider doing regular lunges. As you get stronger, you can add the jumps.
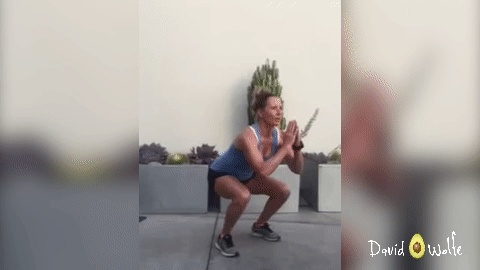
3. 180 Squat Jumps
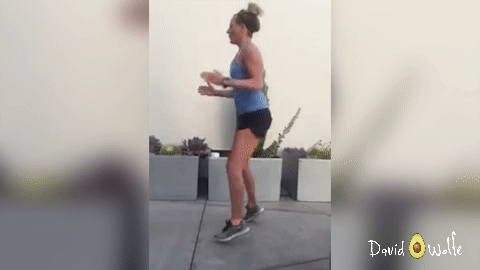
How To Do It
- Start with your feet about hip-distance apart, or a little wider, with your toes slightly turned out to about 11 and 1 o’clock.
2. Go into a low squat, then jump up while turning toward the opposite direction.
3. Make it a continuous move so that you land in a squat position, and immediately jump up and turn to face the opposite direction.
What To Avoid
- Do not lean over, but rather try to keep your upper body upright and stick your butt out, just like you would do a regular squat.
Modify To Your Needs
- Instead of jumping, you can pivot to the opposite direction, then perform the squat. As you get stronger, you can add the jumps.
4. Plank Cross Tap
How To Do It
- Start in plank position. Place hands under the shoulders while keeping a slight bend in the elbow. Feet should be hip distance apart.
2. Tuck hips slightly so that you maintain flat back alignment.
3. Pull your abs in tight!
4. Bend your left leg and take it underneath and across your body to the other side.
5. Try to tap the floor with your toes as high up toward your hands as possible.
6. Return to the starting position and repeat on the other side.
What To Avoid
- Do not droop down or put your butt up in the air.
- If tapping is too hard, simply cross under and over, as far as you can.
Modify To Your Needs
- The further apart your feet are, the easier the exercise.
- The further you cross your leg over, the harder it is. Simply touch the other side as far as you can go. As you get stronger, you will be able to increase the distance.
5. Squat
How To Do It
- Stand with your feet positioned about hip distance apart.
2. Position your toes at 10 and 2 o’clock to allow more flexibility and a deeper squat.
3. Squat down, pushing your butt back, while keeping your upper body as upright as possible.
4. Take the squat as deep as you can while keeping your feet flat. Focus your weight in your heels.
5. Return to starting position and repeat.
What To Avoid
- Do not allow your knees to go forward past your toes.
2. Do not allow your knees to bow inwards.
3. Do not lift your heels off the ground.
4. Do not shift your weight to your toes. Keep the weight in your heels.
Modify To Your Needs
- If this is too difficult, keep the squat shallow. Eventually, you will be able to go deeper.
- Do not lean over with the upper body.
6. Single Leg Deadlift
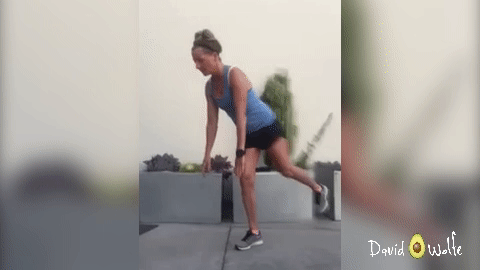
How To Do It
- Stand with feet hip-distance apart and your knees slightly bent.
2. Allow your arms to hang naturally at your sides.
3. Slowly bend at the waist, keeping your chest proud while sticking your butt back.
4. Keep a flat back and keep your head aligned with your back as you go down to a 90-degree angle (or close to it) while lifting one leg.
5. Keep your grounded leg slightly bent. The lifted leg can be bent as well.
6. For more of a challenge, try to avoid touching the ground with your lifted foot.
7. Return to starting position and repeat the move, focusing on a strong core for stabilization. To help with balance, stare at something a few feet in front of you that is not moving.
8. Do 45 seconds on one leg, then switch to the other leg.
What To Avoid
- Do not arch or round your back, but rather keep it flat.
- Do not straighten your legs entirely. Keep the knees slightly bent.
- Do not look up. Instead keep your head aligned with your neck and back, as if looking over a cliff.
Modify To Your Needs
- For beginners, try this keeping both legs planted on the ground at first. Once you have mastered that, you can try doing the single leg deadlift.
7. Spidey Crawl
How To Do It
- Lie face down on the floor. Place your left arm out in front of you as far as you can, and place your right hand near your chest. Extend your left leg and bend your right knee, placing your right foot near your right hip (think spidey position).
2. Lift your body off the floor and begin crawling, taking the position to the opposite side while staying low to the ground. Crawl forward 3 times, then backward 3 times.
3. Keep moving forward and backward as a continuous movement.
4. Keep your abs tight!
What To Avoid
- Try to avoid putting your butt too high in the air. You want to keep your body close to the floor as much as possible, without actually lying on the floor.
Modify To Your Needs
- Perform the exercise on your knees by bringing your right knee up to your right side, then switching to the other leg while staying in one place.
8. Around The World Lunge Combination
How To Do It
- Stand with feet hip-distance apart.
2. Starting with your left leg, take a big step forward so that your front leg is far enough in front of you to allow you to lower into a full lunge at a 90-degree angle.
3. As you do this, push your hips forward. Then, as you rise back up, push off with your heel and step back to the starting position, then immediately move into a side lunge to the left.
4. Push off with your heel, back to start, and step backward with the same leg into a back lunge.
5. Return to starting position to complete one repetition.
6. Continue the lunging on one side in one continuous move for the duration of the time. Then go to the right side and repeat for 45 seconds.
What To Avoid
- Avoid losing your balance. If you are having trouble with balance, try staring at a spot
in the room that is unmoving while performing the exercise. - Avoid leaning your upper body forward and over your knee. Instead, keep your upper body as upright as possible.
Modify To Your Needs
- If this is difficult, start with forward and backward lunges until you feel confident to add to them.
- You can also break lunges up into separate exercises (front lunges, back lunges, side lunges).
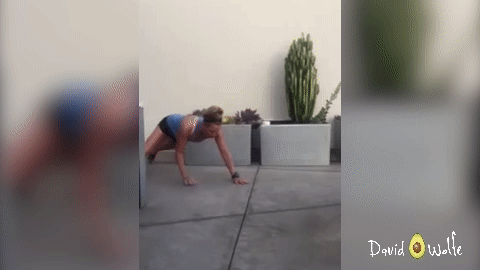
9. Push Up Shoulder Tap
How To Do It
- Get in plank position with extended arms, a slight bend in the elbow, and place your hands just a little outside shoulder-width apart.
2. Your body should be in a straight line from the back of your head to your hips in plank position. Keep your neck neutral and in line with your shoulders.
3. Lower your body toward the floor.
4. Return to the starting position. From this position, take your left hand and tap your right shoulder. Then take your right hand and tap your left shoulder.
5. Repeat the entire sequence and continue as a continuous movement.
6. Pull abs in tight during the entire move.
What To Avoid
- Do not let your hips sag or your butt stick up in the air — maintain a flat back.
- Do not drop your head or neck – keep it aligned with your back.
3. Do not let your shoulders droop – keep them strong and aligned with the top of the back.
4. Avoid twisting the hips too much. A little is OK, but use your abs to stabilize so that you keep them as square to the floor as possible.
Modify To Your Needs
- You can widen the distance between your feet for better stability.
- Perform the exercise on your knees until you are stronger.

Kyra Oliver
www.yourownutopia.com
https://www.facebook.com/kyraoliver/
@kyraoliver